Thursday, 16 February 2012

Project - Walking up steps and Jump


From the above reference, I understood that the arms swing back and forth when the character is preparing for the jump. 

Some of my key poses:


For this project, I redid a walk cycle for the front part of the animation as my previous animation didn't include the head. I then made my character go up the steps, which was quite simple. Then, it came to the jump. At first, I was unsure of how to animate the jump, but I visualized a jump in my head and tried to implement it into my animation. I also played around with the rotations of the spine to achieve my final animation. At the end of the jump, when the character lands, I animate the palms to face downwards a little, so as to show that the character is bracing himself for the impact and for more balance.

Final videos:


Front:


Side:


Perspective:


Reflection:


After doing the walk cycle, this project was quite straightforward as it is basically the same, using keyposes to animate the walking up of steps and jumping motion. The only problem I encountered was that my jump looked a little slow. But I made up for it by showing weight when the character lands, by translating the hip down and then up when it regains the upright posture.

Reference:


Project - Walk Cycle


This is the reference I used for my walk cycle. 

Following the reference picture, these are my key poses:

Contact:

Recoil:

Passing

High-point:

Process:

Using the side view, I created 240 frames of walking by repeating the above key poses. To make it more realistic, I used a period of 5 frames for the lifting up of leg, which is realistically slower as compared to the downward movement of the leg, where I used a period of 4 frames instead. I also translated the hip up and down accordingly, to show the character's weight. Using the motion trail as a guide, I ensured that the movement of the hips is smooth and realistic. Afterwards I went frame by frame to check for errors such as the feet passing through the ground and corrected them.

Then, I moved on to the front view to adjust the translation of the hip sideways, as well as the rotation of the hips. Switching between the front and perspective view, I also rotated the shoulders to make my animation more realistic. 

I switched back to side view to move the arms accordingly. I went back to following the reference for this. I decided to exaggerate the arm movement as I wanted my character to be more cartoony.

I played around with the graph editor to adjust the curves, especially the hip's translation.

Lastly, I added more details by playing with the ball roll when the foot lifts off the ground, as well as when it lands. This made my animation a lot more realistic as it showcases the flexibility of the foot. I also rotated the wrist to show overlapping movement and to make it look less rigid.


Final videos:

Front:

Side:

Perspective:


Reflection:

This project gave me an insight into the basics of animation. I think the walk cycle is the first step to 3D animation, like how a bouncing ball animation is the first step to 2D animation. I also learnt that sometimes, animation requires trial and error. I played around with translations and rotations of the hips and shoulders to see the different results they will give. Observation is also very important, when in doubt, I asked my friend to walk around while I observe his movements. Overall, I am quite satisfied with my work. :)

References:


This video is very useful as it shows us not only the side view, but also the front view, which shows us the rotation and translation of the hip.

Extras - Impressive rigging demo reel


I came across this demo reel and found it very interesting. The rigs done by this guy are very detailed and well done. The muscleman's rig was impressive as it shows the muscles working with every movement. There are also cartoony rigs, animal rigs, as well as mythical rigs. I learnt that, although animals have different joints from humans, some parts work similarly, such as the bird's talons as compared to the human toes.

Wednesday, 15 February 2012

Rigging - Female body


This exercise requires us to create a female body rig. I have to say, this was an extremely tedious exercise, with multiple videos to follow. The start was fairly simple, where I had to create a skeleton using the joint tool as shown below. These joints then had to be named appropriately to avoid confusion during the rigging process. Terms such as Lft_Hip and Rht_Hip are used to keep the naming conventions consistent.


After that, I followed the video tutorial to parent the joints accordingly. Then, I created the joints for the arms and fingers in the same way, by using the joint tool. Afterwards, I had to ensure that the axes were pointing in the same general directions as to prevent problems in the future. This was fairly simple, except the fingers, where I encountered some problems where the axes could not be adjusted. To solve the problem, I duplicated a finger which has the correct axes and replaced the problematic ones.

Moving on to creating the IK handles, I initially used the SCSolver, which was incorrect. I quickly deleted and redid the IK handles using the RPSolver. After creating the IK handles, I had to snap the pivot points of the IK handles accordingly to their respective joints.


Next, I create controllers for the legs using circles, scaled to fit the feet as shown above. Using the point and orient constraint, I managed to make my leg twist and move accordingly by controlling the controller. Afterwards, I added attributes such as the ball lifts and toe lifts to make the feet more realistic and flexible.

The process that followed next was a tedious one regarding the Set driven key tool. By setting key values accordingly, it allowed the joints to move and rotate. Next came the knees where an edited sphere was used. The sphere was then attached to the ankle IK using a pole vector constraint. Then, I parent it to the foot's controller. Following the video, a cube was used for the shoulder controller. I created a locator and snapped it to the shoulder joint. Like the knee, a pole vector constraint was also used to attach the controller. The elbow controller was created in a similar way. The hip controller was simpler, a cube that is pivoted to the centre of the pelvis joint with a point and orient constraint. The neck and spine controllers were created using curves and enabling rotations for some joints.

Poses:


Running

Sitting


 Kung fu


Reflection:
This exercise was the most time consuming of all. I had been wondering how rigs are created ever since the spiderman exercises. Now that I've tried it myself, I must say that rigging is an extremely tedious process. I've learnt that rigging a human body is not easy, as we have to take into consideration the number of joints we have and the terms for them. Every joint is essential to create a realistic and workable rig.


Tuesday, 14 February 2012

Bigdog animation


Exercise 1:

i)      If engineered or programmed badly, BigDog would fall over. Watch the full video again, and describe how BigDog’s legs move while walking– ie. what is the sequence of leg movements for one complete step? Use the terms BL, BR, FL, and FR for the back-left, back-right, front-left and front-right legs.

    The legs will move alternately, according to this sequence: FR moves together with BL, FL moves together with BR.

ii)     Explain how this sequence of movements manages to balance BigDog’s body weight.

      When bigdog is falling to the right, his FL and BR will move across to support his right side. Then bigdog's FR and BL will then move across and the cycle continues for awhile to allow bigdog to regain balance fully.

iii)   Look at BigDog_kick_slow_motion.mov. Draw a storyboard of BigDog stabilising itself after being kicked.

You should draw the key poses. You don’t need to draw well – but you must show the leg positions and the body rotations around the X, Y and Z axes for each key pose.

Storyboard:


Animating BigDog

Firstly, I created 3 key poses by translating bigdog to show the general movement in that direction. 

I then adjusted the body by rotating it to show that bigdog is falling over. I moved the legs accordingly, FL and BR crossing over, followed by FR and BL. After a few steps, bigdog finally regains its balance. I rotated the body accordingly to exaggerate the fall and to make my animation more realistic. I also played around with the translation of the body by moving it down when bigdog lands and moved it up at the end when bigdog has regained his balance and stood up straight.

I added a small step at the end to place bigdog's legs at their final positions.

Final video:


 Reflection:

This exercise was very challenging as we have to brainstorm on how bigdog will move, as well as observe videos to figure out the movement of the legs. The movement has to be logical and realistic. Other than the legs, the rotation and translation of the body must also be considered. I experimented with different rotations to end up with the one shown in the video. This exercise taught me the importance of the thinking process during animation, especially when animating irregular movements such as this.

Reference:


Spiderman - Weight shift

For this exercise, I used the spiderman rig to show shifting of body weight from one leg to the other.

1st key pose - At the start, spiderman is resting on his right leg as shown below.


2nd key pose - This is the neutral pose between the shifting of weight.


3rd key pose - Lastly, spiderman has fully shifted his weight onto his left leg.


Final video:


Reflection:

This was quite a challenge as we have moved on from posing to actual animation. Our tutor told us that we have to create key poses first and then work on the in-betweens. I am very satisfied with my work as I feel that the transition is smooth. And the shift in weight is obvious and clear. From this exercise, I have learnt to observe movement more clearly. When in doubt, I faced the mirror and perform the action to observe details such as the feet placement.

Reference:
- Myself
- Youtube video

Tuesday, 31 January 2012

Key poses

Today, our tutor talked to us about key poses, explaining to us the meaning of extreme poses. He also showed us examples using a bouncing ball, which makes it clearer to us. However, having extreme poses is not enough for a good animation. We need in-betweens.

Example, for a bouncing ball, having three extreme poses to form a bounce will not make it realistic at all. We need to add in-betweens to form the arc of the bounce.

Straight-ahead VS pose-to-pose
Straight-ahead is not flexible to changes, basically we have to change everything just to cater to one change. Hence, pose-to-pose is preferred.

The graph editor is very useful to control the curve of movement.


Stages of animation:
Key poses -> Timing -> Graph editor

To make the ball more realistic, create 'weight'. Things to consider will be inertia and gravity. It's about easing in and easing out. Using the graph editor, a gentle slope gives a slower motion to the object.

Tuesday, 24 January 2012

Character design

References:

Buzz Lightyear:
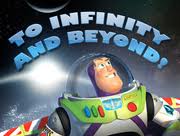
The name of my character is Lightyear, which I drew inspiration from the existing character, Buzz Lightyear from ToyStory. I find the name Lightyear pretty relevant to my character as it suggests speed, as if one can travel several lightyears effortlessly. I also adapted Buzz's tagline as it is one of my favorite lines.

The Flash:
The general outlook of my character is similar to my favorite superhero, The Flash, as my character will don the same colors, red and yellow. I admire The flash's speed and would like to implement it into my character.

Captain America:
Captain America is my second favorite superhero. I was quite upset when they decided to remove the wings from his head in the later versions as he looked better with them. Hence I decided to implement the wings on my character's head as a "tribute".


Little Green Men: 
Little green men from ToyStory is my favourite cartoon character as they are so cute and adorable. As it was inappropriate to implement their most distinct feature which is their three eyes, I decided to make their logo my character's logo, which is a planet with a ring.

Initial sketches:


Final character:


Name: Lightyear

Tagline: "To infinity, and beyond!"

Introduction: 
Introducing Lightyear, a child superhero that I have created by merging parts of my favorite cartoon/superhero characters to form one. Lightyear is part of a superhero team, the Zius League. Together, they will save the day, anyday. He has several superpowers, such as:

  • Lightning speed
  • Elasticity
  • Flight


Story:


Millions of lightyears away from Earth, there exists another planet crawling with liveforms, planet Zius. Zius was once a peaceful place, a haven, you may say. Until now. Evil forces from neighboring planet, planet Crix, have invaded Zius, to take control by force, and to claim their land. Who will stand up to these forces, who will save the day? The Zius League of course.


Driving force:
The driving force of Lightyear, is the same as that of the Zius league, to maintain peace in planet Zius, and fight the bad guys, of course!


Appearance:

  • Lightyear has a small build as he is a child superhero. I gave him limbs without details such as hands and feet to make it more cartoony and casual.
  • Lightyear dons a mask like most superheroes and has two wings on his head to symbolize flight.
  • Lightyear dons a planet logo on his chest which signifies his planet Zius.


Behavior:

  • Lightyear is the youngest and fastest of the Zius League.
  • Lightyear is mischievous and full of pranks, the joker of the Zius league.


Short dialogue:
-Over the communication system-
Zurk(Captain of Zius League): "Lightyear! Where are you?! We have a meeting in 5!"
Lightyear: "Knock knock!"
Zurk: "Sigh....  Who's there?"
Lightyear: "Disco!"
Zurk: "Disco who?"
Lightyear: "Disconnected."
Zurk: "Lightyear...?"
Zurk: "LIGHTYEAR!!!"


Reflection:
This exercise taught me how to brainstorm for ideas and draw inspiration. Usually, when I draw characters, I only draw the basic pose, which is the front view. This exercise taught me that different views and poses are hard to draw as we have to consider the positions of every body part. I had fun researching on my favourite characters and combining them into one character.

Three poses


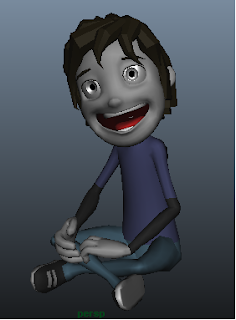
Pose 1: Girl sitting down and smiling

Reference image:

My model:

This pose was quite manageable. The only problem I had was to figure out how to nicely position the legs and hands so that they will not intersect one another! I also played around with the facial features to make the model look happy.

 Pose 2: Girl posing with her hands on her hips

Reference image:

My model:

This pose was harder than the first, as I had to consider the flow of the body parts, especially the curve of the hips and waist. I had to do trial and error several times to achieve a natural look, with a properly curved back. I also tried to make the eyes smaller to mimic the reference image! A huge problem I encountered was the arms and wrist. Due to the rig provided, it is very hard to achieve a similar look to the reference image as the hands are too large. If I were to position the wrists like those in the reference image, the arms will be stretched too much.


Pose 3: Guy dribbling a ball

Reference image:

My model:

This pose was quite challenging as it did not provide a proper view of the person. However, I did my best to make my model look like the one in the reference image. I think I did a pretty good job with the curve of the back as well as the feet. I shifted the hips down to make the model look like it was slightly squatting. I also added a ball for effect!

Reflections:


After this exercise, I learnt that a good rig requires much thinking and appropriate joints. And due to some constraints of the rig, it is very hard to achieve a total similar look as the reference image. Posing also requires quite a bit of trial and error to get the position right.

Tuesday, 17 January 2012

Spiderman Pose 3


Reference image:

My model:


This is my third pose for spiderman, and also my favourite. I think I did quite a good job with this pose as it is very dynamic. My positioning of the limbs and body are also well done and natural. ^_^

Spiderman pose 2


Reference image:

My model:


This is the second pose for my spiderman exercise. I am very satisfied with my work as it is quite similar to the reference image and the curves of the shoulders are appropriately done. However, limitations of the rig caused some problems, such as the thumb isn't able to twist more and small issues with the feet.

Spiderman pose 1


This is the final result of my exercise. I had much difficulty with the arms (elbows) part as it was difficult to accurately place the arms without cutting into the body. I had to make several adjustments to achieve the above. Overall, I am quite satisfied with my work as it looks well-balanced.

Sunday, 15 January 2012

Modeling a cow - body


Starting off with a cuboid and extruding faces for arms and legs, I get the above as shown. I adjusted the vertexes to create a more realistic body, such as the belly and the back. 


Next was the neck. I encountered problems with merging the vertexes due to carelessness. I accidentally merged the vertexes with those of the hooves unknowingly. I only realized it later and was too late to undo. However, luckily I had saved my previous versions of the body separately and  was able to redo it on an older version.


Next was the hands. It was fairly simple, with extrusion and moving of vertexes to create a more rounded look. However, the first time I did it, there were small unwanted extrusions at the side after converting the polygons. Hence I tried my best to fix it and achieved the  results below.


I then placed the hands accordingly and merged the vertexes.


I also scaled the head to a suitable proportion to the body and merged the vertexes to the neck. 


And this is my final cow.


This exercise has taught me the importance of saving multiple versions of a project in-case an error occurs. I have also learnt to create more realistic and rounded edges. Extrusion is also very useful in modelling and does not increase the polygon count. Overall, I am quite satisfied with my work. (: